Monday, January 30, 2012

Wishing you all a good week

Some weekends I get so busy, weekdays look like they were stress free.  It feels like all the events are happening at once during one weekend.  Sigh!!!  This past weekend was one such.  Though we had fun, there was no time to relax.  I am sure you all have had such weekends.

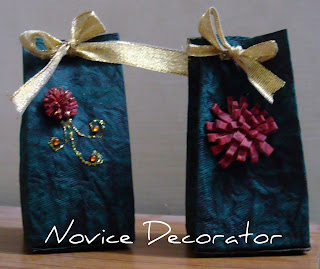
I made this few weeks ago but I forgot to post it.


Hope this week will be peaceful and joyous to you all.
Linking this to

Friday, January 20, 2012

Guest post - DIY treat bags


For Makara Shankranti festival, in certain regions of Karnataka, families exchange mixture of Ellu (white sesame seeds) Bella (Jaggery) which is mixed with peanuts, neatly cut dry coconut along with sugar candy molds of various shapes with a piece of sugarcane.  It is for renewal of relationships.  We normally pack the mixture in a plastic bag with the sugar candy.

This year my SIL R decided to make fancy goodie bag to pack this.  Her goal was for it to be plastic free.
They were so beautiful, hence this post.  Here it is.


Materials required:
  1. Paper-co​uld be a decorative gift wrapping paper,hand made paper,news​paper/ maga​zine(-to recycle is good ). Here I've used handmade paper of 0.5mm thickness.
  2. Scissors​,a paper punch,rule​r,glue and a decorative ribbon.
  3. Stickers​,glitter glue, etc., can also be used.
Cut the paper for 21.5cms length and 15cms breadth.Ma​ke markings at 5,10,15,20 and score the paper.Simi​larly, score the paper at 5cms on the 15 cm side.  You will see four rectangles of 10x5 cm and 4 squares of 5 cm and, a small rectangle of 10x1.5cm and another rectangle of 5 x 1.5cm (lo​wer right corner of the image).  After the cut, your paper must look like this.
Please ignore the first horizontal score in the picture.It is not necessary.
Glue the 'x' marked squares- the 2nd, 3rd and the 4th squares
Next step
The small rectangular flap of 10x1.5 cm should go on the inside of the box. It must be glued to the inner side of the first rectangle. Tap the inside of the paper with a ruler so that the base and the sides are glued properly.O​r else, the box could come apart. Trim the excess paper off the edges.
Push two opposite sides towards each other gently and press together the other two sides. Punch two holes on each side of the box such that the holes are aligned.

Now on to decorating the bag.

Take a piece of coloured paper about 2cms wide and 8cms long.Fold it into half and make cuts through the paper as shown. open the fold and glue the paper on the inside.  Fol​d the paper and glue the paper on one side.  Roll the paper into a flower as shown. Glue the base and the outer petals of the flower.
Stick the flower on the bag and flatten the outer petals such that they stick to the surface.   Needle the decorative tape through the holes with both free ends of the tape on one side.

Tie the ribbon and decorate the the goody bag with glitters and stickers.  You may try out different sizes and versions of the same.  Before starting off, make a prototype of the bag with a newspaper or a magazine so that you will know what changes can be made.  These bags are plastic free and look pretty.

Linked it here.
Friday Fun Party & Features
Colours Dekor
Joyful Stamper

Tuesday, January 17, 2012

How is it going?

We have been having some beautiful weather.  It has been bright and sunny and didn't feel like winter at all last week.   I know winter is still lurking around for few more weeks.  I noticed new shoot in two of my orchids.  I am very excited about that.

I haven't made any new year resolutions this year but instead have small goals which I would like to achieve.  Lets see how that works out this year.

You all saw my first Madhubani post.    So, I did decide to frame it. 


After all the encouragement I got from you all, I decided to try two more.  Here they are.   What do you think?

Tree and a Bird
I framed them and put them up in one of the rooms.  I am glad I finished these before life at work got too hectic.  They are now on the wall in our living room.

Have a wonderful week.

Linking this post to

Sunday, January 8, 2012

New beginnings and a new year

I hope this new year has started off on a good note to you.  It has brought me lot of hope and some confidence in me.  I have a feeling that this year will be good to me.  I have quite a lot to look forward to this year. 

I decided to blog about the Ganesha trilogy.  Who better to remove the obstacles than the elephant faced god.  This past summer my 13 year was at home looking for a project to do, I showed the Ganesha trilogy blogged at Sensitive creations.  She decided to try her hand with that.  I did email  Sharkara @ Sensitive Creations.  After she was okay with it, we went shopping for the canvas.  Here are the results of her work. 

I am really happy the way it turned out.  They are now on display in our living room.  They are an excellent addition to my collection of Ganesha. 

I hope 2012 brings lots of happiness, peace and prosperity.

I am looking forward to a successful blooging year as well.

Linking @
Colours Dekor